Unless it’s a really special occasion, like a holiday or a dinner party, I prefer to cook and bake with ingredients I have at home. On a practical level, it saves me a trip to the grocery store (and on a day this cold, I appreciate staying in my cozy apartment). On a creative level, it allows me to take advantage of the foods and flavors I have on hand, and play around with different combinations.
I found myself with a basket of very ripe bananas. When I bought them on Tuesday, there were touches of green along the edges and sides, a good indication that they would last more than a few days. I like bananas – they’re portable, nutritious and filling – but I eat them when they just turn completely yellow, sometimes even with a little green remaining, when they still have some bite and aren’t too sweet or banana-y. I don’t consider myself a picky eater by and large, but I will not eat a brown-speckled banana. Can’t stand them.
So, when I am left with a bunch of quickly browning bananas, it’s time to cook them. Ripe or very ripe bananas may be mushy and overpowering in the flesh, but cook them, and they become something different entirely. Sometimes I’ll slice them and cook them with a little butter, brown sugar and rum – makes a great accompaniment to brownies or ice cream, or brownies and ice cream. Other times I’ll saute them quickly with just a little bit of butter and brown sugar, then mix them with my oatmeal. Very tasty.
But last night I found myself with 4 ripe bananas, a desire to bake, and luckily enough, an old issue of Cooking Light (I have stacks of them). The October 2010 issue has a feature on banana breads, a recipe makeover of sorts for a baked good that’s usually loaded with oil or butter. The recipes in the magazine offered a new take on Banana Bread, while still keeping it moist, flavorful, and delicious. The addition of flaxseed meal, which I profiled yesterday, adds healthy Omega-3 fats and lots of fiber. After reading through the recipe for Peanut Butter Banana Bread and evaluating all the ingredients in my pantry, I made some tweaks, one substitution, and one addition (vanilla extract, because really, how do you bake without vanilla?). I am happy to report that this recipe was easy to prep and easy to execute, and the results were down right magical.
RECIPE: Banana Bread
Ingredients:
- 1 1/2 cups mashed banana (about 3 to 4 medium ripe bananas; sprinkle with lemon juice to keep from browning)
- 1/3 cup fat-free plain yogurt
- 1/3 cup creamy peanut butter*
- 3 tbsp. of butter, melted
- 2 large eggs
- 1 tsp. vanilla extract (the real deal)
- 3/4 cup packed brown sugar**
- 1/4 cup white granulated sugar
- 1 cup all-purpose flour
- A scant 1/2 cup of whole wheat flour***
- 1/4 cup flaxseed meal
- 3/4 tsp. baking soda
- 1/2 tsp. salt
- 1/2 tsp. cinnamon
- 1/8 tsp. ground allspice
- A pinch of ground nutmeg
Notes:
* If you’re allergic to peanuts, you can remove this ingredient from the recipe, and increase butter to 5 tablespoons.
** Alternatively, you can use 1/2 cup packed brown sugar and 1/2 cup white sugar.
** *If you don’t have whole wheat flour, you can use a scant 1.5 cups of all-purpose flour in this recipe. I like whole wheat flour in this recipe because it adds fiber, which cuts back on the guilt. Sort of.
Method:
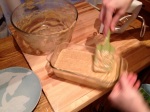
Preheat your oven to 350 degrees. Grease a 9″x 5″ loaf pan.
Combine the flours, baking soda, salt and spices in a bowl, and sift them together into another bowl. This helps to thoroughly combine the dry ingredients, plus it helps to keep the larger wheat grains from getting in your batter.
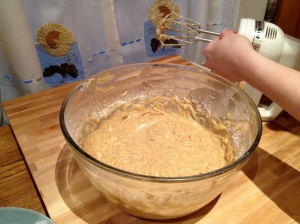
Set the dry ingredients aside. In a large bowl, combine bananas, yogurt, butter, peanut butter, eggs and vanilla. (Tip: when measuring out the peanut butter, spray your measuring cup with a hit of nonstick cooking spray. This way all the PB in the measuring cup will come right out.) Blend everything together with a mixer on medium speed until all ingredients are mixed.
Next, add your sugars, a bit at a time, to ensure you break up any lumps from the brown sugar.
Follow with the sifted dry ingredients. Again, add a little at a time – this time mixing on low speed at first and then increasing to medium speed until everything is well incorporated.
Pour batter into the greased loaf pan, then even out the batter with a spatula before putting the bread in the oven. Get the pan in the oven, set your timer for an hour, and wait patiently. It’ll be difficult (especially if you’re hungry) but you can do it. This bread is worth the wait, and it will make your home smell delicious. 
After about 40 minutes, turn the light on in your oven and check on your bread. I bet it’ll look pretty. But it’s not done yet! If you notice that the edges of the top of the bread are browning too quickly, get your oven mitts on, quickly remove the bread from the oven and cover loosely with aluminum foil. Return the bread to the oven and let it bake till the timer goes off.
Ding!
Remove the pan from the oven. Once you’ve gently poked a toothpick into the bread and it comes out clean, cool the bread in its pan on a wire rack for 10 to 15 minutes (no less! You are a pillar of strength and patience!). Then, gently remove the bread from the pan and continue cooling on a plate for about 30 minutes.
Okay, now you can cut the bread. Have a slice. You deserve it. Have the banana bread alone, accompanied by a hot cup of coffee or tea, or with some cranberry sauce on top. Totally random idea that turned out to be really yummy.
Storing Banana Bread: Once the loaf has cooled completely, you can wrap slices (or the loaf) in aluminum foil, and keep for 4 days outside the refrigerator. Otherwise, this bread freezes really well. Slice first, then freeze – this way your portions are set, and you won’t have to cut into a frozen loaf later on.
Weight Watchers Note: Sixteen equal slices of this bread yield a Points Plus value of 5 per serving, which isn’t bad if you’re looking for a treat. However, thicker slices will obviously yield a higher points value. If you want a thicker slice (one big enough for breakfast that’ll hold you over till lunch), eleven equal slices will yield a Points Plus value of 7 points per serving.


