The Easiest Freakin’ Pulled Pork You Will Ever Make In Your Life, and What To Do With It

IMG_9634 2Sitting at my desk early on a rainy Friday, I checked emails between recipe searches, looking for a no-fuss weekend project that I could cook while doing the fifteen things I had already planned to do. Inspired by my mother, who made pulled pork in the oven last weekend, and my friend Laura, who posted on Facebook that she had made Kalua pork tacos, I had pig on the brain, and I focused my Googling efforts on pork shoulder.

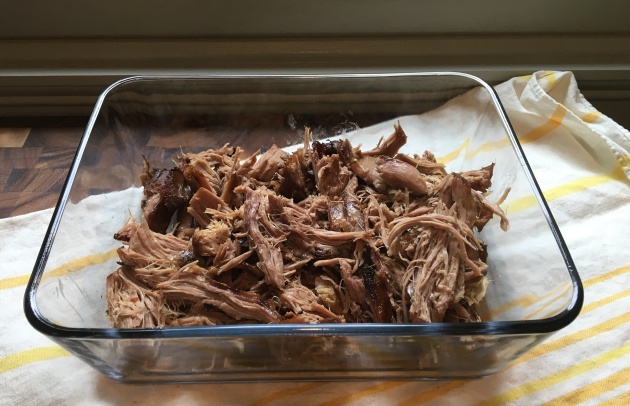
Remember how I said I was looking for no-fuss? Well, I found it on SkinnyTaste: a three ingredient recipe for pulled pork that cooked in fourteen hours with almost no human intervention. How was this possible? It was a recipe for Crock Pot Kalua Pork.

I will admit that although I’m not gaga over slow cookers the way many of my more culinary-inclined friends are, I own two of them (a large one to cook for crowds, and a small one when I’m just cooking for me & Paul). Yes, they’re great for chilis and soups and injecting life and flavor into dried beans, and once I made perfect poached chicken in the slow cooker, but otherwise I don’t consider it the life-changing appliance many people do.

Well—I didn’t. And then I made pulled pork in my slow cooker.

I’ve got a recipe and instructions below, but what I need to tell you guys is that this is the perfect recipe to prepare when you have a hundred million things to do and have no time to cook.  A slow-cooking pork shoulder fills your house with this wonderful smoky, baconesque aroma, and if you turn on the crock pot before bedtime, you will wake up the next morning to PORK. (Seriously, Saturday morning was like waking up in Jenny’s House of Bacon. Amazing.) And a pork shoulder (AKA pork butt) is a big piece of meat, so you can make it last meal after meal using it all kinds of ways:

  • tacos
  • on Sandwiches with pickles and cole slaw and sriacha mayo
  • with rice & beans
  • in a hash with eggs and toast
  • in lettuce wraps with Hoisin sauce & veggies

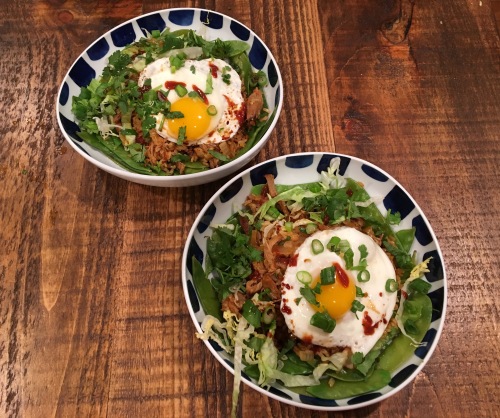
Or you could do what I did for dinner tonight, and make Pulled Pork & Kimchi Fried Rice. FANTASTIC. I followed all the instructions in this recipe & substituted the pulled pork for the spam (because, uh – pulled pork rates better than spam any day).
FullSizeRender 4


RECIPE:

No-Fuss Slow Cooker Pulled Pork

Adapted from Skinny Taste
FullSizeRender 5

Time: 14.5 hours, largely unattended

Special Equipment: 4-quart programmable slow cooker (crock pot)

Ingredients:

  • 1 boneless pork shoulder, 2 – 3 pounds
  • 2 tbsp coarse sea salt (red Hawaiian salt is great if you can find it)
  • 1.5 tbsp liquid hickory smoke (such as Stubb’s)

Note: start the cooking the night before you want to serve the pork.

Method:

Unwrap the pork shoulder and trim of excess fat (the chunks and so forth, not the marbling). Sprinkle the salt on the meat and press it into the flesh. Put the pork in the slow cooker, and pour the liquid smoke on top.

Place the lid on the slow cooker and program it for 8 or 10 hours on Low (mine has a 10-hour option). Then, go put on your pajamas and go to bed.

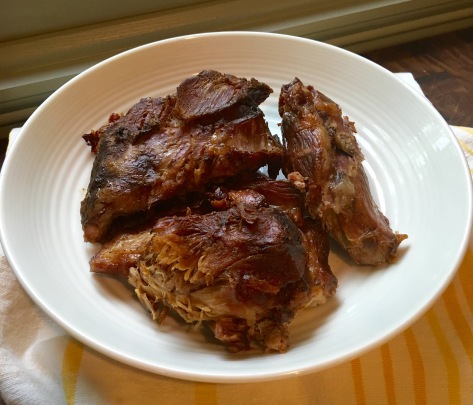
Wake up the next morning and inhale the aromas. Then check on the pork. It’s going to look brownish gray and sitting in a pool of its own fat and juices. This is actually what you want. When the timer goes off, remove the pork from the slow cooker carefully and set it aside in a dish. Then pour out the fat & juice mixture.

Return the pork to the slow cooker, drizzle two spoonfuls of the juice on top of the pork and cover again. Set to cook on low for 4 hours.

In the meantime, let the juice cool and then refrigerate. The fat will float to the top and congeal, and then you can spoon it off easily. Save the juice to make sauce, or just to keep the pork moist.

When the timer goes off the second time, remove the pork from the slow cooker and allow to cool for about a half hour. Then, using two forks, shred the meat. Once its completely cooled store in a glass container in the fridge for up to 4 days, if it lasts that long. When you’re ready to use it, reheat gently on low using some of the leftover juice.

Serves: 4 – 6

Lazy Sunday Breakfasting: Blueberry Pancakes

Pancakes_05

Today I finally made good on a promise I made to my husband close to a month ago: I made blueberry pancakes for breakfast. We’re not usually heavy breakfast people, and pancakes are really heavy.

Well they can be – when they’re not done right. I spent a few weeks trying to track down a recipe that would yield light, fluffy pancakes with a slightly crisp exterior and moist berry-licious interior that wouldn’t turn to purple glop on the griddle.

I found Joanna Pruess’s recipe for the Best Buttermilk Blueberry Pancakes in the New York Times Cooking app, and while I thought Pruess was audacious in calling her recipe The Best, I have to tell you – the woman knows whereof she speaks, because this recipe made the tastiest, lightest and most satisfying pancakes I’ve ever cooked up at home.

The only modifications I made to Pruess’s recipe were thus: (1) I cut all the measurements exactly in half since I was cooking for two, which works beautifully for two hungry people or four people who are eating the pancakes with sides. (2) I used 1.5% fat buttermilk, which is the kind I use whenever I do anything with buttermilk. (3) I added about a quarter teaspoon of vanilla extract to the wet ingredients. My mom used to make pancakes from Aunt Jemima mix when I was little, and she always added vanilla. Let’s just say I was feeling nostalgic.

Admittedly, these are much better than the pancakes I ate growing up. Or I should say they were much better. They’re all gone now. Paul and I had a delightful breakfast.

Pancakes_02


Dinner for Two: Buttery-Garlicky-Spicy Calamari with Israeli CousCous

FullSizeRender

I must credit two people for introducing me to what has become my favorite special-occasion-feeling fast-food meal. The first is Melissa Clark, who wrote the recipe for the dish you see above, and the second is my dear friend, Tracie, who gifted me Melissa Clark’s Cook This Now, the book that contains said recipe.

I adore Melissa Clark because she takes dishes that seem complicated and makes them super simple and un-intimidating (like this one). And then once you make the dish, stand back and admire your work, you feel like a superhero / star chef. I love that feeling.

I grew up eating a lot of calamari, usually fried. It was a staple of our Christmas Eve menu as well as our Good Friday one. Good ol’ Italian Catholics and their affinity for seafood. My mother makes the lightest fried calamari you’ve ever tasted. It’s never greasy or rubbery or heavy or fishy, probably because my mom knows how to buy seafood, and she knows how to fry. I’ve become comfortable cooking fish fillets in the last six months, and while I can do a lot with shrimp and I’ve finally figured out how to sear scallops (hot pan! hot pan!), I have stayed away from squid. A—I don’t fry food, and B—I had distinct memories or seeing it inky, sandy and slippery on the kitchen counter from my childhood. Gross.

Ms. Clark introduced me to buying cleaned squid and sauteing it in butter and olive oil. Life-changing, let me tell you! Cleaned squid, tentacles and all, takes minutes to prepare. You cut the bodies into half-inch rings and leave them on paper towels to dry, then pat dry again. Leave the tentacles whole, unless they’re huge, in which case you just split them in half with your knife. It’s totally not gross. Also, something my mother taught me—fresh seafood doesn’t smell fishy. It smells like the sea. So if you get home and unwrap your squid and it stinks, wrap it back up and take it back to your fish dealer. Get a refund, and don’t buy from them again.

Israeli couscous is a great partner for the squid here – it’s light and creamy yet still has some bite, it absorbs the sauce well, and if you get the tri-color kind like I did, it certainly looks pretty. I found some beautiful snap peas at the market, so I served them steamed with the squid & couscous. You could substitute broccoli or baby spinach as well.

One word of note: This dish takes ten minutes to prepare, but to achieve greatness in those 10 minutes, have all your ingredients ready and the table set. You and your sweetie will be treated to an amazing meal, I promise.

RECIPE:

Buttery-Garlicky-Spicy Calamari with Israeli CousCous

adapted from Cook This Now by Melissa Clark

  • Prep time: 15 minutes
  • Cooking time: 10 minutes
  • Serves: 2

Ingredients:

  • 1 cup stock (chicken or vegetable)
  • pinch of salt
  • 2/3 cup Israeli (pearl) couscous
  • 2 tsbp. butter
  • 2 tbsp. extra virgin olive oil
  • 1/2 pound fresh raw squid, bodies cut into 1/2 rings, plus the tentacles, patted dry
  • 2 cloves garlic, minced
  • 6 basil leaves, cut into ribbons
  • handful of parsley, chopped
  • 1/4 tsp. red pepper flakes (or more to taste)
  • salt & pepper to taste
  • quarter of a lemon (to squeeze)

Method:

  • Add broth & pinch of salt to a 1.5 or 2 quart saucepan, then bring to a boil. Add the couscous, return to a boil, then cover and turn the heat to its lowest setting. Set your timer for 10 minutes.
  • This would be a good time to prep a vegetable for steaming in the microwave. Or, you could whip a green salad together. Just sayin’.
  • When the couscous has 5 minutes to go, heat a large skillet (not non-stick) over high heat. After a couple a minutes, add the butter and olive oil. Once the butter is melted and the foam subsides, add the squid and stand back (there may be some sputters and pops – careful!). Be patient and don’t poke the squid for a solid minute.
  • Add the garlic, basil, parsley and pepper flakes and stir everything together. You’ll see some sear marks on the squid (this is good), and you want to cook it till its just opaque throughout, which is really easy to see. Sprinkle salt and pepper on top and remove from heat.
  • Stir in the couscous till its coated with the sauce, then squeeze the lemon over the mixture (watch out for pits!) and stir again. Serve immediately with a nutritious green vegetable and a glass of something light and crisp, like a Grüner Vetliner.

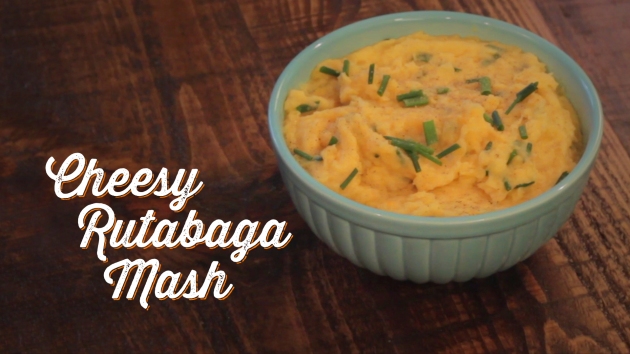
Video & Recipe: Cheesy Rutabaga Mash

Today’s a very exciting day on the blog. I’m posting my first video demo! Making a video for MITK is something I’ve been wanting to do for years. I have a background in video production and I love to cook, so you’d think I would have done it sooner.

May I present to you my entry for the CreateTV Cooking Challenge

I chose to make rutabaga the subject of this video for lots of reasons. I discovered it earlier this winter after I (once again) found myself exhausted with butternut squash and sweet potatoes. I had a hard time finding references for what to do with rutabaga – there are very few videos and articles devoted to this often-ignored vegetable, which is really a shame because it’s DELICIOUS! Seriously. And what I really love is that it’s not sugary-sweet the way that butternut & sweet potatoes can be. Rutabaga is wonderful roasted, but it’s positively ethereal when mashed with potatoes and cheddar.

You will love this, I promise.

Recipe: Cheesy Rutabaga Mash

MagicInTheKitchen_EP010

Prep Time: 15 minutes / Cook Time: 25-30 minutes / Serves 8 as a side dish

Ingredients:

  • 2 pounds rutabaga (1 med-large)
  • 1 pound Idaho baking potatoes
  • 2 bay leaves
  • 2.5 tbsp kosher salt, divided
  • 2 quarts tap water
  • 3 tbsp unsalted butter (salted is OK, but you may want to decrease the kosher salt)
  • 1/4 cup milk
  • 1.5 cups shredded cheddar cheese (the sharper, the better!)
  • 1/3 cup chopped fresh chives, plus more for garnish
  • Freshly ground black pepper

Method:

Use a Y-peeler to peel the rutabaga, making sure to peel away all the wax and skin. Cut into 2″ pieces and set in a large pot or Dutch oven. Next peel the potatoes and cut into 2″ chunks, then add to the pot. (If you want to do this ahead of time, you can refrigerate the rutabaga and potato separately- potato should be kept in cold water to avoid browning up to 4 hours ahead of cooking).

Add the bay leaves, 1.5 tablespoons of the salt and water, covering everything in the pot. Cover and set on high heat until boiling.

Once the water boils, continue cooking for 22 minutes, or until a fork easily pierces the rutabaga. If it crumbles a little, that’s okay – this is a situation where a little overcooking is actually quite fine.

Drain and remove bay leaves. Return vegetables to the pot, then add butter, milk, and the remaining salt. Using a potato masher, mash the mixture until it’s uniform and silky.

Next add the cheese and 1/3 cup chives and stir with a wooden spoon until the cheese is melted and fully incorporated. Top with the extra chives, freshly ground pepper and serve.

Storing: If you have leftovers, or do what I do and cook a lot of food on Sunday, this dish keeps up to 4 days stored in an air-tight container in the refrigerator and reheats beautifully in the microwave.

A couple of things I learned as I was researching rutabaga and testing this recipe:

Make sure to cook the rutabaga uncovered once the water starts boiling. While it’s cooking rutabaga releases a gas that’s kinda smelly, so you don’t want to contain that within the pot. Including the bay leaves in the cooking water is essential for this reason, and it also helps neutralize the bitter edge rutabaga can sometimes have.

Rutabaga will keep for weeks in the fridge, but keep in mind its taste will get sharper the longer it sticks around. You can still cook with it, but you may want to add more butter & cheese so it’s not as pungent.

Potato is a key ingredient here because it has the starch that rutabaga lacks. Potato is what gives this mash its silkiness and body.

You could use another cheese or combination of cheeses here, like Pecorino Romano or Fontina or even goat cheese. Just remember that some cheeses, like Pecorino, are saltier than others, so you may want to adjust the second addition of salt.

You could use cheddar and skip the chives, instead seasoning the rutabaga with a combination of spices, like chipotle chile powder and smoked paprika. This would go wonderfully with pork and chicken. I prefer my cheddar & chive version with steak.


Put an Egg on It


Tuesday night dinner: Brussel sprouts, butternut squash & parsnips roasted with olive oil and thyme, on a bed of farro with mushrooms, topped with an egg (that’s sunny side up, not fried).

Roasted veggies and cooked grains are side dishes by themselves. But put an egg on your plate and you have dinner. Or even brunch. Either way, this is a colorful, satisfying and super-nutritious meal.

For my WW friends, this plate is 9 Smart Points, ready in 35 minutes.

Breakdown:

3 SP = 1.5 cups roasted vegetables with olive oil

4 SP = .5 cup Farro with mushrooms

2 SP = one egg, cooked in a non-stick pan with just a spray of olive oil