Lazy Sunday Breakfasting: Blueberry Pancakes

Pancakes_05

Today I finally made good on a promise I made to my husband close to a month ago: I made blueberry pancakes for breakfast. We’re not usually heavy breakfast people, and pancakes are really heavy.

Well they can be – when they’re not done right. I spent a few weeks trying to track down a recipe that would yield light, fluffy pancakes with a slightly crisp exterior and moist berry-licious interior that wouldn’t turn to purple glop on the griddle.

I found Joanna Pruess’s recipe for the Best Buttermilk Blueberry Pancakes in the New York Times Cooking app, and while I thought Pruess was audacious in calling her recipe The Best, I have to tell you – the woman knows whereof she speaks, because this recipe made the tastiest, lightest and most satisfying pancakes I’ve ever cooked up at home.

The only modifications I made to Pruess’s recipe were thus: (1) I cut all the measurements exactly in half since I was cooking for two, which works beautifully for two hungry people or four people who are eating the pancakes with sides. (2) I used 1.5% fat buttermilk, which is the kind I use whenever I do anything with buttermilk. (3) I added about a quarter teaspoon of vanilla extract to the wet ingredients. My mom used to make pancakes from Aunt Jemima mix when I was little, and she always added vanilla. Let’s just say I was feeling nostalgic.

Admittedly, these are much better than the pancakes I ate growing up. Or I should say they were much better. They’re all gone now. Paul and I had a delightful breakfast.

Pancakes_02


The best Monday dinners are the ones that take 15 minutes to make

I like to spend Sundays in the kitchen cooking for hours. These are my moments of zen, and on a practical level, I do the bulk of my cooking for the week ahead. After a long, cold Monday like today, I like a meal that takes no time but doesn’t feel like leftovers. Here’s a great example…

On the right: soy-mustard marinated pork tenderloin

On the left: salad of mixed baby greens, golden and red beets, walnuts and goat cheese. Dressing is an EVOO/balsamic/Dijon mustard/honey concoction that is just perfect on beets.

And, that entire plate comes to 8 Weight Watchers SmartPoints. Squee!


After the Barbecue: What to Do With All Those Leftovers

Yesterday, my husband and I threw a barbecue/potluck/housewarming—a little over a year after we moved into our house in Glen Ridge, New Jersey. Yes, a little late for a housewarming, but this was the first real party we’d hosted at our home, and we had something to celebrate: the completion of our kitchen renovation. Somebody’s got a brand new playroom!

Not the This Old House photo spread I was hoping for, but you get the idea.

Not the This Old House photo spread I was hoping for, but you get the idea.

Oooh... shiny!

Oooh… shiny!

By the end of the night our fridge was full of leftover salads, half-finished condiments, and a ton of food we didn’t even get to eat—like 5 pounds plus of hamburger meat. I froze a lot of stuff, packed up lunches for the week, filled containers full of leftover potato salad, coffee cake, and nuts to bring to the office, and still there was more food left.

Time for some re-inventing.

Leftover item: Crudité

New dish: Roasted Veggies

IMG_0019Ever notice how the veggies left over on the crudité plate are broccoli & cauliflower? There’s a reason for that: they taste better when they’re cooked. The veggies are already washed and cut, so all you have to do is slide them into a roasting dish, toss with some olive oil, salt & pepper, and BOOM: tasty, healthy side dish.

Leftover item: a dozen lime wedges & the very last of a bottle of Hendrick’s gin

Concoction: Gin gimlet

IMG_0022To be fair, I make gimlets throughout the summer, but in this case I had exactly two ounces of gin, and a glass container full of lime wedges I cut yesterday for the Corona drinkers. Squeeze enough lime wedges to yield an ounce of juice, then add an ounce of simple syrup and two ounces of gin. Stir, pour over ice, add a lime wedge, and you’re golden.

Leftover items: ground beef, sliced cheddar cheese, tomatoes, red onion, salsa, sour cream and tortilla chips

New dish: Nachos

IMG_0027I always feel like a rebel when I eat nachos for dinner, probably because if my mother knew that’s what I was eating she’d never let me hear the end of it. But how can you argue with tortilla chips layered with spicy beef, tomatoes, salsa and coated with melted cheddar cheese? #winwin

Leftover item: bread

New dish: Bread Pudding

IMG_0024Paul (that’s the husband) and I make one of two things when we’re faced with an abundance of stale bread: Ribollita, which is a Tuscan soup made with tomatoes, spinach, beans and bread (which I make), and bread pudding (which Paul makes). The thermometer hit 92 today, so there was no way we were making Ribollita.  Bread pudding is great for lots of reasons: it’s delicious, it’s endlessly adaptable (we added dried cherries and chocolate chips), it’s pretty cheap and super easy to whip together.

So there you have it: leftovers reinvented. Happy post-partying!

The Recovery Plan

Peach & Strawberry Jam

About a week ago, I sat at my computer reviewing my ever-growing expenses and felt my left eye twitch. The twitching, I’m told, is caused by stress, and since a complete overhaul of one’s budget isn’t exactly the most peaceful exercise, I turned to the interwebs for distraction.

I ended up here.  Melissa Clark, high priestess of The New York Times Dining section and fellow Brooklynite, was making and canning jam. And she was making it look so easy! I make fruit sauces and refrigerator jams all the time, but true canning would allow me to preserve the best tastes of summer to enjoy all year long. Until I saw Clark’s demonstration I had been more than a little intimidated by the process: boiling and sterilizing jars, ensuring each jar has enough “headspace” and is sealed airtight, creating enough space in the kitchen to carry out the process from start to finish—it’s a lot of stuff. But Clark inspired me.

Hello, Weekend Project.

I bookmarked the video and made a trip to Whisk, a cooking supply store here in New York, for canning supplies. (They also have a well-stocked online store.) Even though you don’t need any special equipment for canning, a few tools make the process go much easier: a jar lifter, a wide-mouth funnel, a lid wand, and a set of tongs to lift the rings.

I’m getting ahead of myself. For the amateur home canner, the best jars to start with are 4-ounce or 8-ounce glass canning jars with metal lids and rings, like these.

As for jam ingredients, I lucked out at the farmers market—it was the last week for peaches, so I stocked my canvas bag full of them. I couldn’t find any of the lemon verbena Clark’s recipe called for, so I decided on some flavorful substitutions: the addition of almond extract (just a few drops) and Wild Turkey American Honey (a couple of generous tablespoons).

I returned home and re-read Clark’s peach jam recipe another ten times, and then watched the jamming & canning video again. And again. Once I was sure I had all the steps down, it was time to prepare the fruit for Phase I: Maceration. This step doesn’t require anything fancy—I combined the peaches, sugar, lemon zest and juice, almond extract and liquor together in a pot, bought it to a simmer, and then transferred the mixture to a big bowl.

Just peachy

It was like looking at sunset: pinks and yellows and oranges swirling together, shining brilliantly. Sigh. I covered the bowl, transferred it to the fridge and then headed to bed, a little too impressed with myself and very excited for the morning to come.

Sunday! The weather was perfect for a brisk walk to the waterfront, so I took one and returned home energized and readyfor Operation: Jam! All my equipment was assembled, jars ready for in-pot sterilization, and I had watched Clark’s video for what must have been the twentieth time in twenty-four hours. I separated the fruit solids from the syrup that developed overnight, and poured the rose-hued syrup into my 12-inch skillet and turned on the heat.

The fruit rested peacefully in a colander on the counter, slowly dripping its clinging juice into the bowl below. Bubbles appeared in the syrup as I stirred along. I was impatiently looking for foam, the kind of foam I remember from chemistry experiments gone wild in high school, the high billowing foam that Clark’s syrup produced in the video.

After a few more minutes, I still didn’t see any foam, so I raised the heat and turned my attention to the large stockpot full of boiling water on the adjacent burner. Time to sterilize the jars. I carefully took hold of each jar with the lifter and lowered them into the pot. But they wouldn’t stand up straight like they do in the video (reason: too much liquid in the pot).  Drops of boiling water splattered and stung my hands as I quickly and awkwardly maneuvered the jars.

And then I smelled it: burning caramel. I looked over and saw the syrup foaming and blackening rapidly. I left the jars to tumble in the water, covered the pot and went back to the skillet to save my syrup. I shut the heat and grabbed a spoon to stir, but it was too late.  It was goop. Burned and quickly hardening goop.

Sometimes you have a moment where everything. Just. Stops. You realize you were moving too fast, maybe taking too much on. Maybe you overestimated how good you really are. Or the expectations you had were so high that the level of disappointment you’re now experiencing will destroy your day.

But I wasn’t ready to give up. I mean, it was tempting. But the kitchen was a mess, and I had a project to finish. And it wasn’t going to be finished until there was jam canned in shelf-stable jars. Besides, if I stopped now I’d have go back to the depressing prospect of my unbalanced budget.

I took a breath. Even though the syrup was ruined, I still had the macerated peaches – soft and full of flavor. I had another two pounds of peaches for snacking in the fruit basket & a package of over-ripened strawberries in the fridge. It was time to get back to business and make this work.

RECIPE:

Peach & Strawberry Jam

Adapted from Melissa Clark

The Original Recipe

  • 3 pounds peaches (or combination of peaches and nectarines),
  • peeled and sliced
  • 3 cups sugar
  • 1 lemon, zested and juiced
  • 1.5 tbsp American Honey Liquor
  • 4 drops almond extract

Combine all ingredients in a stockpot or large skillet. Bring to a simmer and stir as sugar dissolves. Remote from heat. Transfer mixture to a bowl and let sit overnight. In the morning, spoon the solids into a colander set over a large bowl, set that aside, and pour all the remaining syrup into a pot. Put the syrup into a wide skillet as Clark instructs, set it over medium high heat and look for the foam to form.

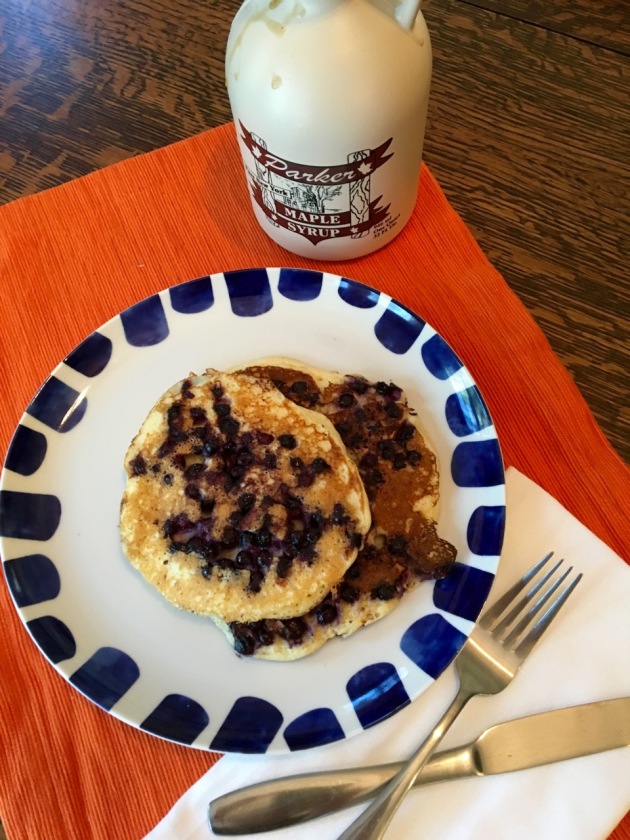
I’m going to pause here since this is where I screwed up—Be patient: I turned my attention away for a couple minutes and… Well, you know the rest. So! Once my syrup was burned and therefore useless, here’s what I ultimately did to make that beautiful jam you see in the picture:

The Recovery Plan:

  • 1 pound strawberries
  • 2 pounds peaches (or combination of peaches and nectarines)
  • 2 1/4 cups sugar
  • 1 lemon
  • 2 tbsp. American Honey Liquor
  • 1/4 tsp. almond extract
  • Macerated peaches from previous recipe

Wash, hull and quarter the strawberries. Peel and cut the peaches into 1” chunks. Combine all ingredients through the almond extract in a stockpot (you heard me – forget the skillet). Set the pot over medium high heat and bring the mixture to a boil. Boil 2 minutes, stirring, until sugar dissolves, then reduce heat to a gentle simmer.

Simmer 25- 30 minutes, then remove from heat.  The fruit will be soft but still intact, and the mixture will be a little thicker but still viscous. Using a large spoon, transfer the fruit solids to a colander set over a large bowl.  Return the syrup to a boil, and allow to boil for 3 to 5 minutes until you see foam begin to form around the edges. Reduce heat so that syrup is at a full simmer. Cook for another 15 – 20 minutes, and continue to stir mixture as it thickens. Be sure to reduce heat if foam rises too high or mixture starts boiling again.

Once your syrup passes the “wrinkle test” in Clark’s video, or registers 220 degrees on a candy thermometer, return the fruit to the pot, stir into the syrup and remove from heat. Cover the pot.

Now, you can focus on the canning. Go forth, home cook, and make that jam.

In Praise of Mom: An Easter Dinner to Remember

I am still full from Easter dinner.

This is not a complaint—I know I overdid it, but I overdid it on a seemingly endless parade of lovingly, masterfully prepared foods, courtesy of my mom. The meal began shortly after 1pm with hot and cold antipasti: homemade salami (thanks to mom’s neighbors, Dominick and Rosa), olives, fried artichoke hearts with tomato sauce for dipping, fresh mozzarella, and a favorite from my childhood—spinach-ricotta triangles.  These are a little like the Greek favorite, spanakopita, except my mom makes individual triangles of the phyllo dough (instead of a pie) filled with spinach and ricotta cheese (instead of feta). They are crisp, feather-light, and dangerously addictive.

For the next course, pasta. But not just any pasta—this being Easter, my mother made raviolini. Some were filled with spinach and cheese, and some were filled with veal & pork. The raviolini were tossed in a tomato sauce, accompanied by sausage and meatballs (made in the classic tradition with veal, pork and beef, and very little breadcrumbs).

After finishing the pasta, we took a breather. There were more raviolini and meatballs left on the stove, but was there room?  Possibly. But the scent of the roasting eye-round from the oven was a reminder that more food was coming.  A serving platter of sliced, pink roast beef arrived on the table in a few minutes, accompanied by a salad, gently dressed with olive oil and red wine vinegar.  A perfect, clean finish.

Well, “finish” might not be the right word. There was dessert to be had, but not until after a good stretch and a long walk. I helped my mother clear the table, and then my boyfriend, our friend Nat and I ambled around the quiet streets of Kenilworth, New Jersey, basking in the sun and rubbing our stomachs, praising the wonderful food we had eaten and wondering how we could possibly fit more in our bellies.

When we returned to the house, we found two platters  on the table, filled with the gorgeous, labor-intensive cookies I see in this house on specific holidays: rainbow cookies, brownies, amaretti, and the ones you see in the picture below—the ones my mom and I simply call “the lemon cookies”.

Mmm...

These fluffy pillows of lemony goodness are my favorites. The cookies are baked, cooled, and then delicately covered with an icing made of lemon juice and powdered sugar. Simple, elegant, and delicious. I love these cookies so much that I don’t want the recipe for them. I don’t want to even try to make them and risk the chance of screwing up, or make them successfully and have the opportunity to take credit for them.  These are cookies I love because my mother makes them for me. They are her art, a showcase of her skill, her talent, of how much love she puts into cooking and baking for the holidays. And every day.

So thank you, Mom, for an amazing meal, a delightful afternoon, and for always welcoming my friends to your table.  I can only hope that I make my guests feel as special as you do.

xo,

J.